Zuarbito
Set up Zuarbito
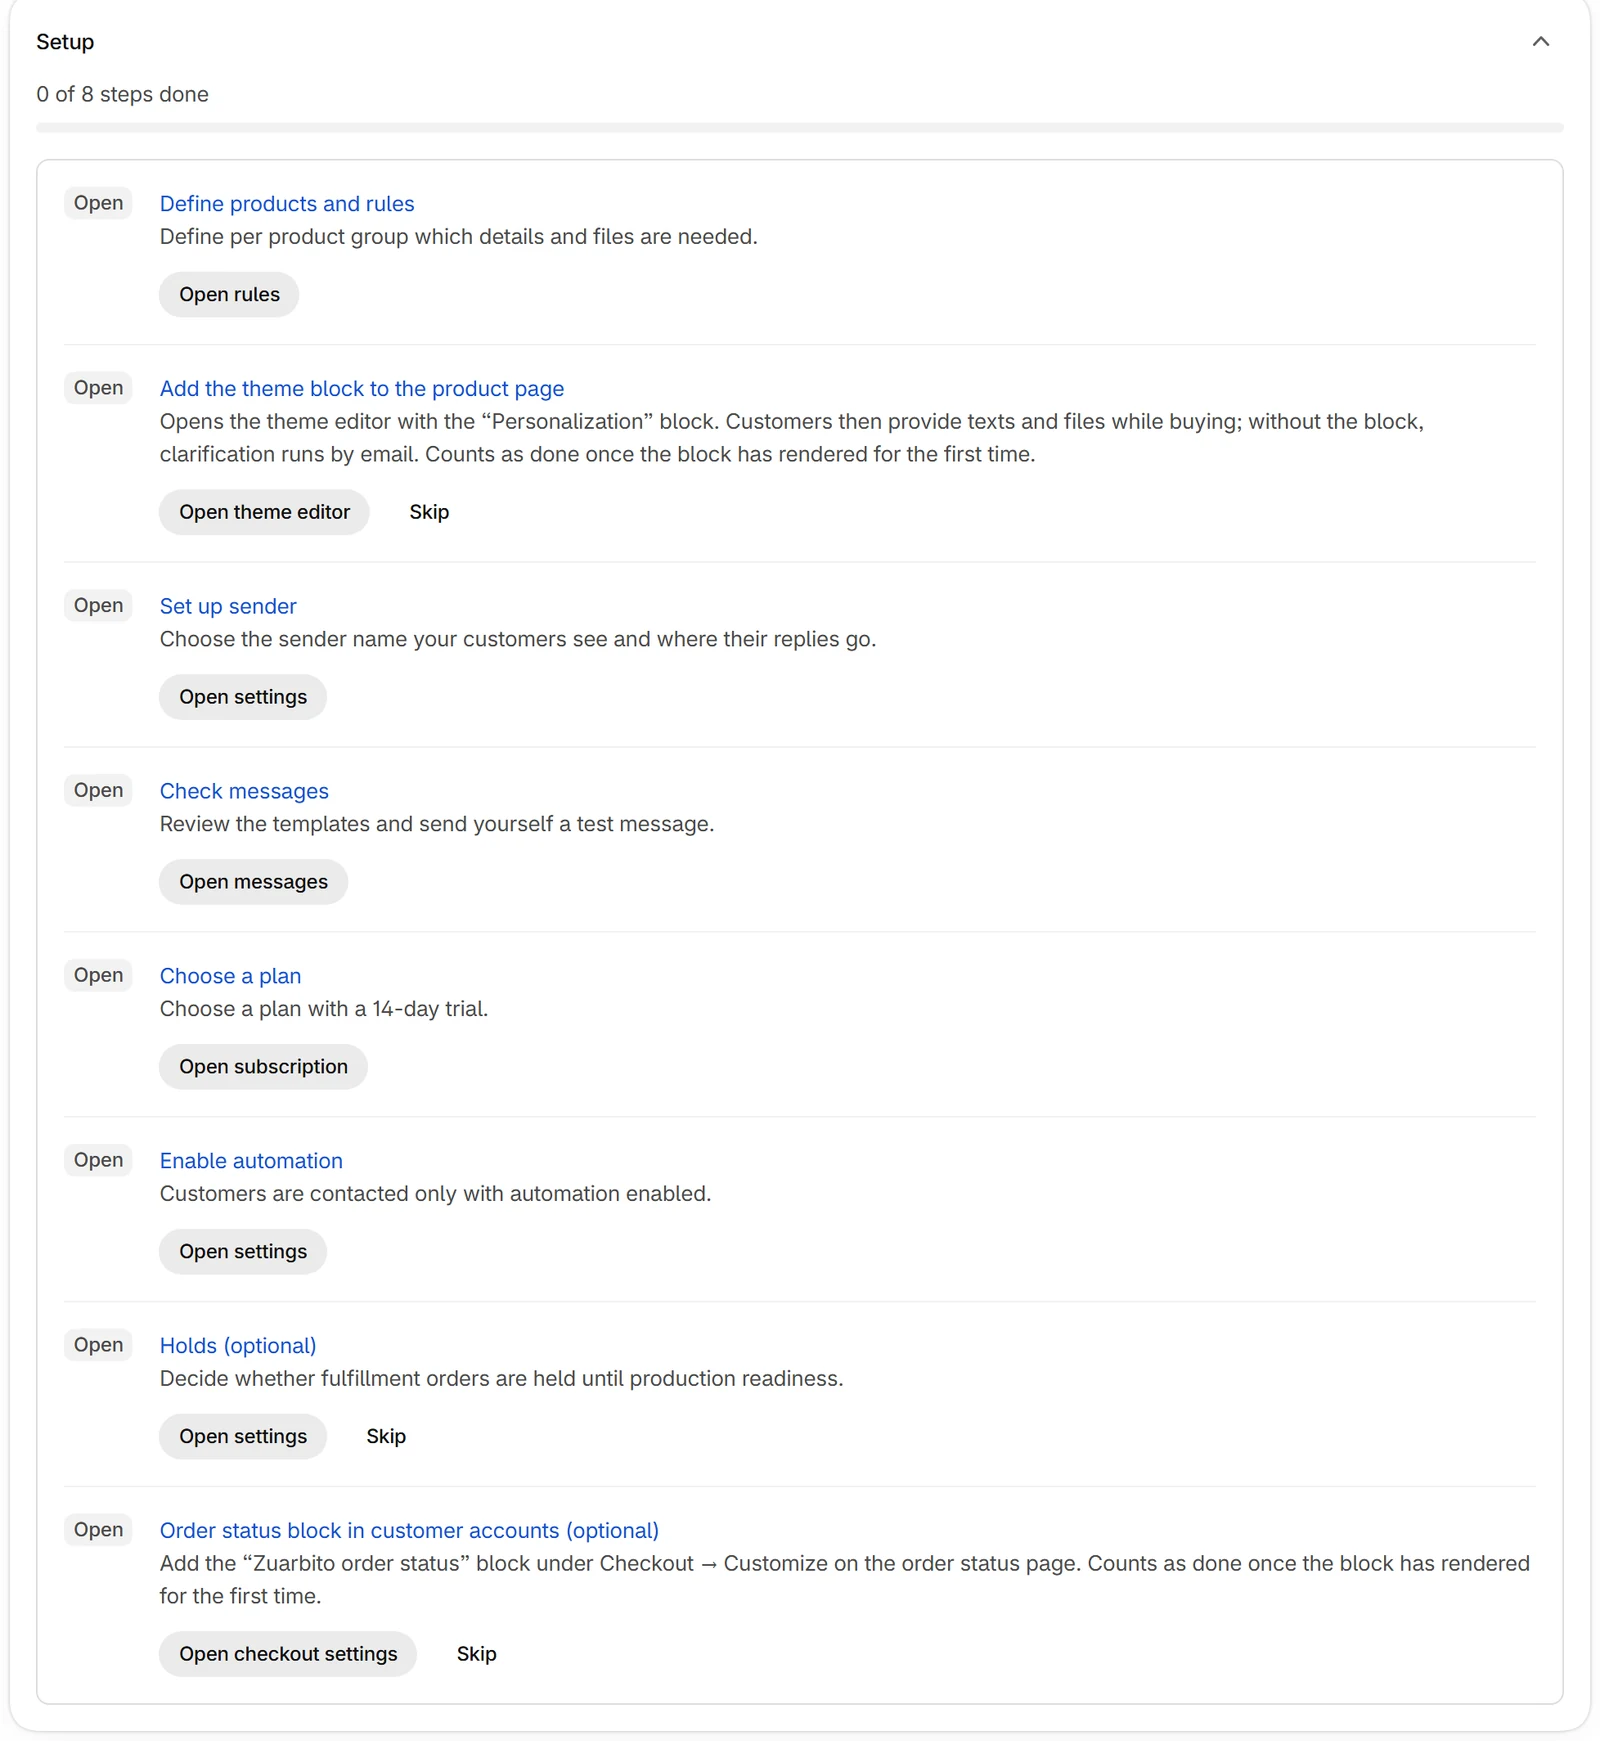
Seven steps from installing to your first order. The app itself shows you what is still open.
Install the app
Install Zuarbito from the Shopify App Store. The app opens in your Shopify admin, and the Orders page lists all steps in the setup section.
- Select “Install” in the Shopify App Store
- Confirm the permissions
- Open the Orders page in the app
Zuarbito starts in observe mode: orders are captured, but nobody is contacted.
Create a rule
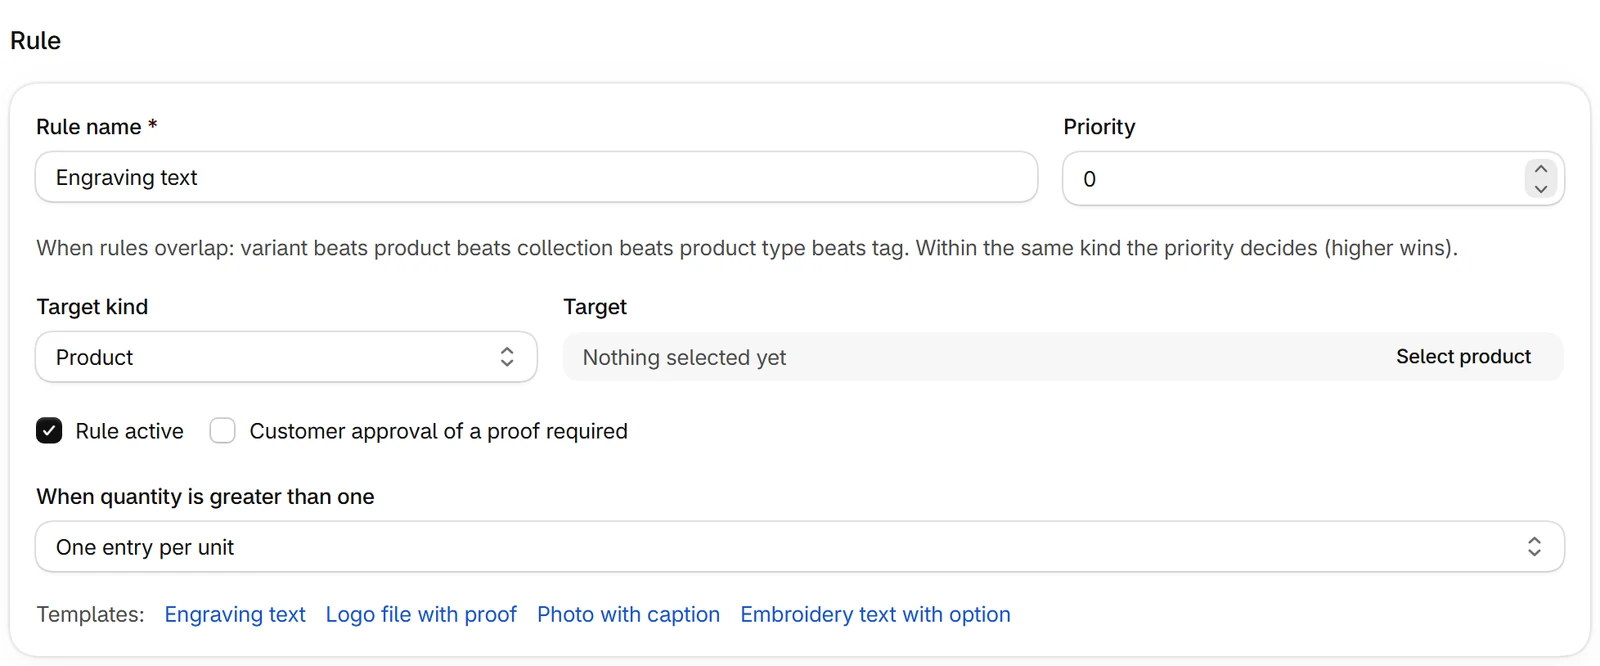
A rule defines which details and files a product needs and whether your customer has to approve a proof.
- Open Rules and select “Create rule”
- Start from a template: engraving text, logo file with proof, photo with caption or embroidery text with choice
- Choose the target: product, variant, collection, product type or tag
- Turn on “Customer approval of a proof required” if your customer should agree before production
- Under “When quantity is greater than one”, choose one entry for all units or one per unit
- Save the rule
Existing orders keep their rule version. You only re-evaluate them on purpose.
Add the theme block
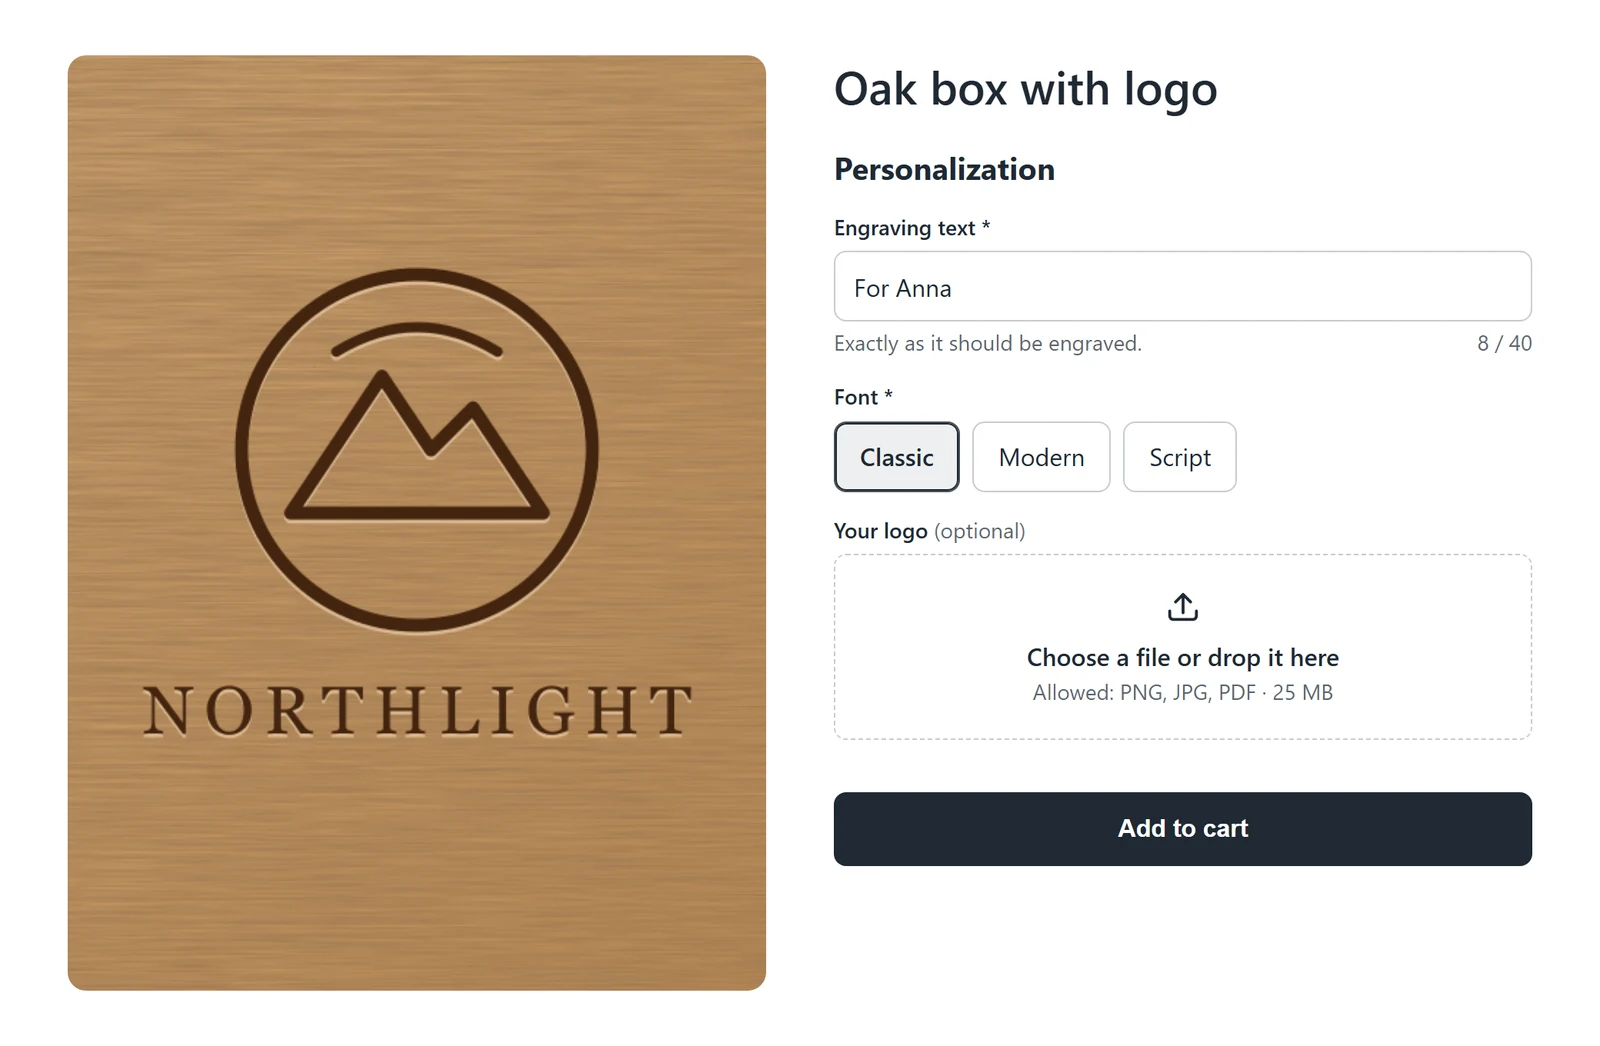
With the block, customers provide text and files while buying. Without it, clarification runs by email, so this step is optional.
- Select “Open theme editor” in the setup section
- Add the “Personalization” block to the product page and save
- Adjust fields, spacing, fonts and colors in the theme editor
The block needs an Online Store 2.0 theme and uses your theme’s fonts and colors without any changes.
Check sender and messages
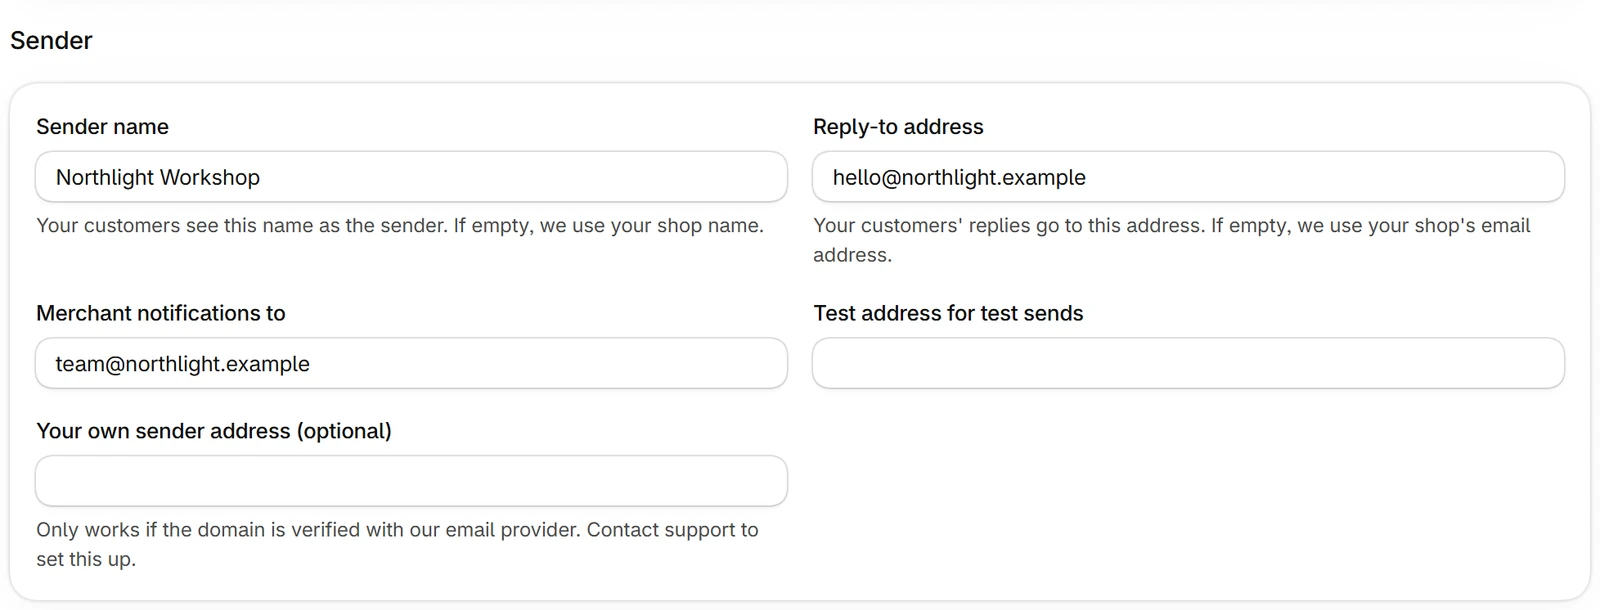
Your customers see your sender name, and their replies go to your reply-to address. You don’t need your own domain for this.
- Open Settings, section “Sender”
- Enter a sender name and a reply-to address. If empty, we use your shop name and your shop’s email address
- Enter a test address and save
- Open Messages, review the templates and send yourself a test message
Choose a plan
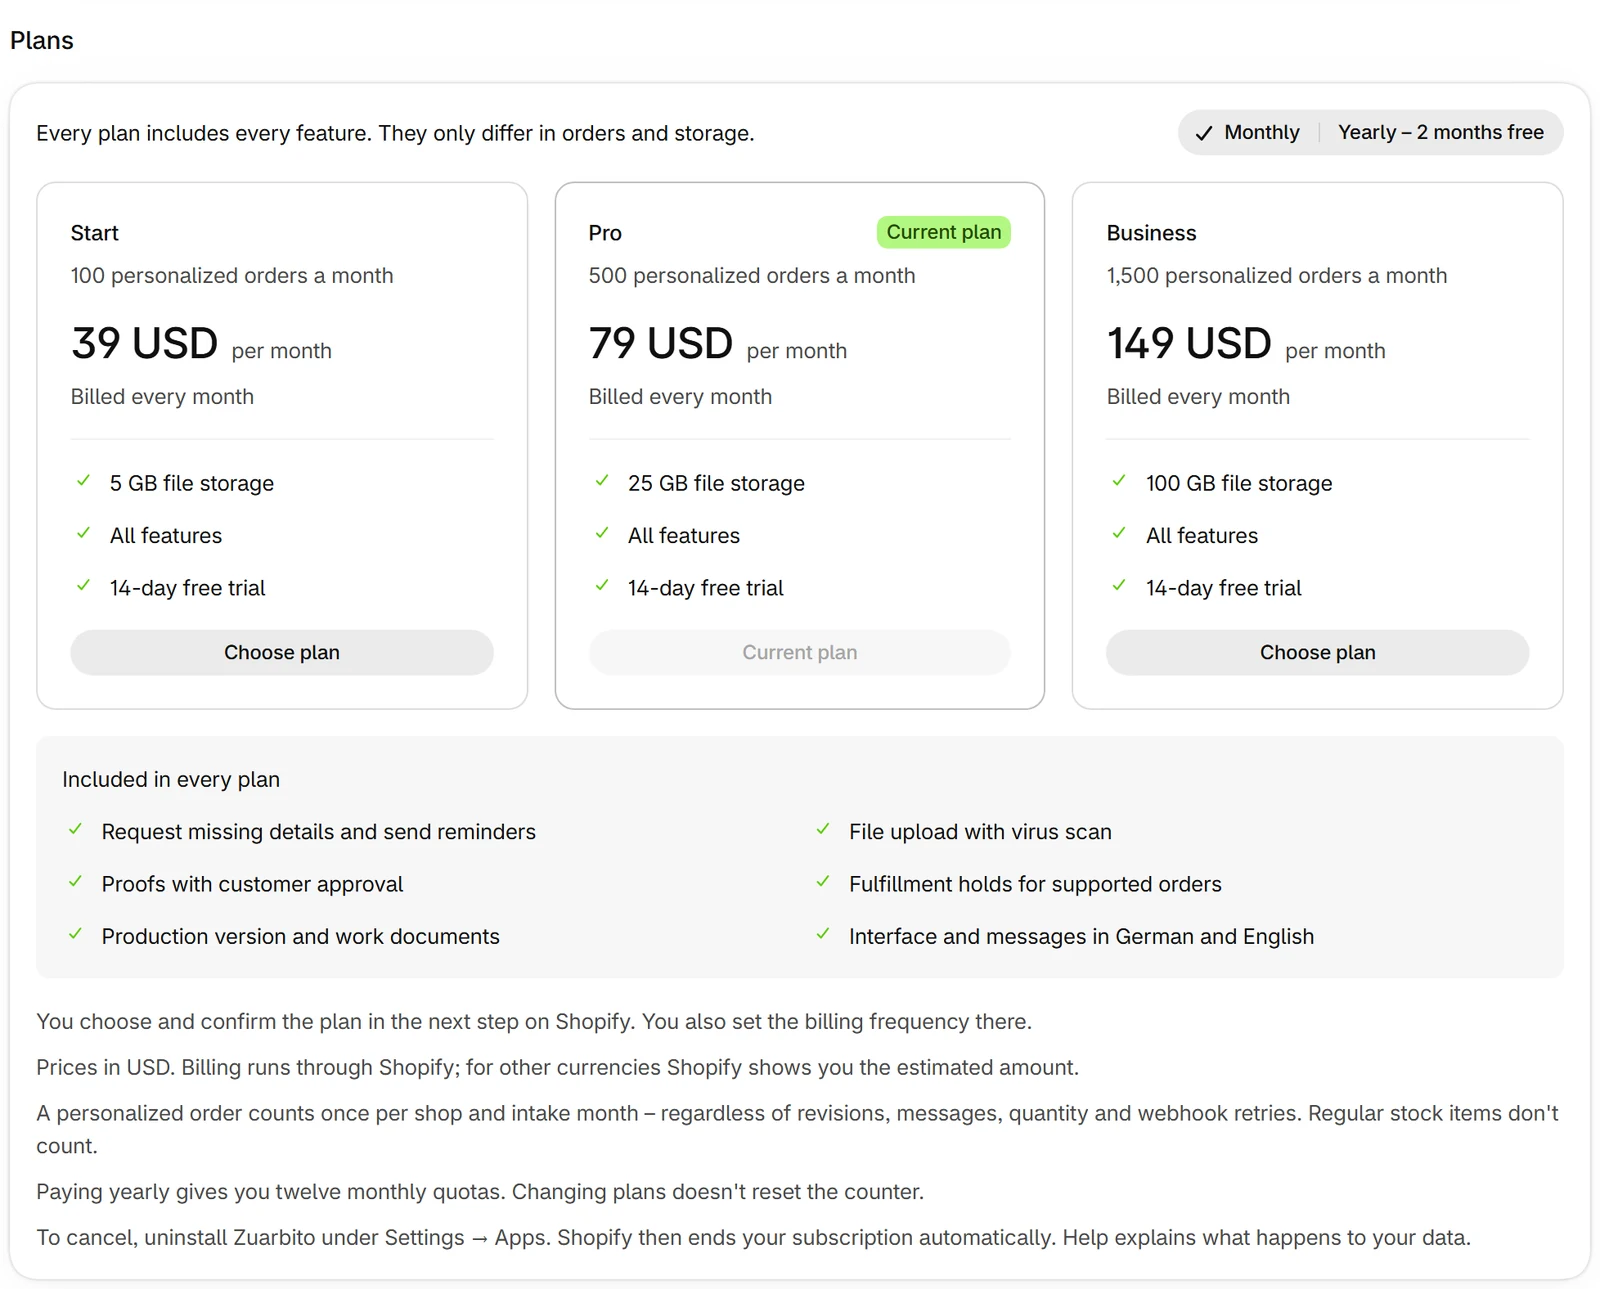
All plans include all features. They only differ in orders and storage.
- Open Subscription
- Choose Free, Start, Pro or Business
- Confirm the plan in Shopify and choose the billing period there
Free stays free, paid plans come with a 14-day trial.
Do a test run with a test order
Before real customers are contacted, run through the flow once yourself. In observe mode, Zuarbito sends nothing on its own.
- In the Shopify admin, create an order with a product that has a rule, using your own email address, and mark it as paid
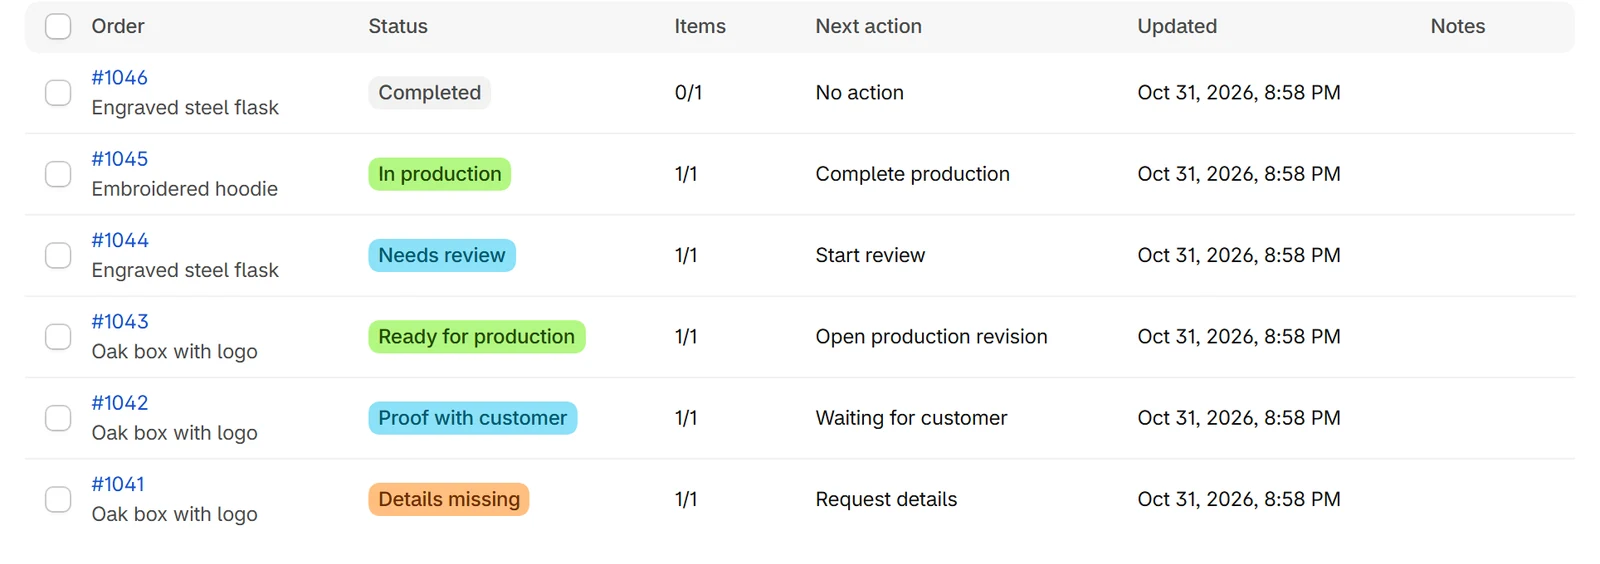
- The order shows up under Orders as “Details missing”. Open it and click “Request details”
- Open the link in the email, add text and a file and send
- Create a proof in the order, send it and approve it through the link in the email
- Mark the item as ready for production and create the documents
- Cancel the test order in the Shopify admin afterwards; Zuarbito reconciles it as cancelled
The test run counts like a regular order towards the monthly quota.
Turn on automation
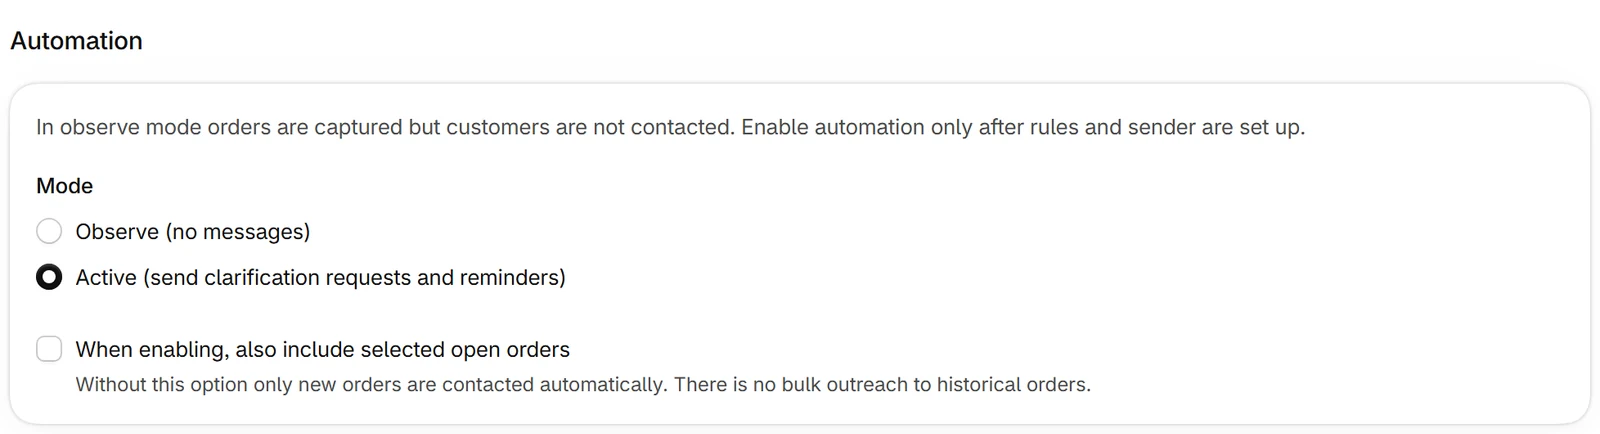
Only now does Zuarbito contact your customers. At first this only applies to new orders, and older orders stay untouched.
- Open Settings, section “Automation”
- Set the mode to “Active”
- Turn on “When enabling, also include selected open orders” only if existing orders should be included too
- Decide in the “Fulfillment holds” section whether fulfillment stays on hold while details or approvals are missing
Handle your first order
A matching order shows up under Orders with its status and next action. This is how it moves along:
- If something is missing, your customer gets the request and adds the details in the portal
- Review the details and create a proof if needed
- Your customer approves the version or requests changes
- Mark the item as ready for production and create the documents
- Start production and complete the order